 |
Matronics Email Lists
Web Forum Interface to the Matronics Email Lists
|
| View previous topic :: View next topic |
| Author |
Message |
pc.king(at)comcast.net
Guest
|
 Posted: Tue Mar 17, 2015 9:08 am Post subject: MK III - New Nose - Nice Job Posted: Tue Mar 17, 2015 9:08 am Post subject: MK III - New Nose - Nice Job |
 |
|
What's wrong with it. It looks factory. You did a nice job. I wouldn't

change a thing.


---
| | - The Matronics Kolb-List Email Forum - | | | Use the List Feature Navigator to browse the many List utilities available such as the Email Subscriptions page, Archive Search & Download, 7-Day Browse, Chat, FAQ, Photoshare, and much more:
http://www.matronics.com/Navigator?Kolb-List |
|
|
|
| Back to top |
|
 |
west1m

Joined: 19 Apr 2014
Posts: 155
Location: Hastings, MN
|
| Posted: Tue Mar 17, 2015 9:19 am Post subject: Re: MK III - New Nose - Nice Job |
|
|
Looks Great! any picts of the building process?
| | - The Matronics Kolb-List Email Forum - | | | Use the List Feature Navigator to browse the many List utilities available such as the Email Subscriptions page, Archive Search & Download, 7-Day Browse, Chat, FAQ, Photoshare, and much more:
http://www.matronics.com/Navigator?Kolb-List |
|
_________________
West1m
Hastings, MN |
|
| Back to top |
|
|
pc.king(at)comcast.net
Guest
|
| Posted: Tue Mar 17, 2015 9:25 am Post subject: MK III - New Nose - Nice Job |
|
|
Did you keep the mold?


You aren't the last person who will want a new nose.

---
| | - The Matronics Kolb-List Email Forum - | | | Use the List Feature Navigator to browse the many List utilities available such as the Email Subscriptions page, Archive Search & Download, 7-Day Browse, Chat, FAQ, Photoshare, and much more:
http://www.matronics.com/Navigator?Kolb-List |
|
|
|
| Back to top |
|
|
Larlaeb

Joined: 02 Apr 2013
Posts: 75
Location: League City, Texas United States
|
| Posted: Tue Mar 17, 2015 10:43 am Post subject: Re: MK III - New Nose - Nice Job |
|
|
Unfortunately most of my pictures of this process were lost when my phone was destroyed (another unrelated story).   I didn't use a plug or a mold. Not to say it was the right way but  this was done with three pieces of flat fiberglass sheet, a small piece of foam, two pieces of PVC (removed after use), some pop rivets (also removed), some fiberglass tape, resin, filler and paint.  I do have a few pics that I will post when I can pull them together.


Thanks,

Allan
| | - The Matronics Kolb-List Email Forum - | | | Use the List Feature Navigator to browse the many List utilities available such as the Email Subscriptions page, Archive Search & Download, 7-Day Browse, Chat, FAQ, Photoshare, and much more:
http://www.matronics.com/Navigator?Kolb-List |
|
|
|
| Back to top |
|
|
pc.king(at)comcast.net
Guest
|
| Posted: Tue Mar 17, 2015 11:01 am Post subject: MK III - New Nose - Nice Job |
|
|
That sounds like a quick build.


The story would be worth telling.

---
| | - The Matronics Kolb-List Email Forum - | | | Use the List Feature Navigator to browse the many List utilities available such as the Email Subscriptions page, Archive Search & Download, 7-Day Browse, Chat, FAQ, Photoshare, and much more:
http://www.matronics.com/Navigator?Kolb-List |
|
|
|
| Back to top |
|
|
Larlaeb
Joined: 02 Apr 2013
Posts: 75
Location: League City, Texas United States
|
| Posted: Thu Mar 19, 2015 7:21 am Post subject: Re: MK III - New Nose - Nice Job |
|
|
Here are a few pictures and a description of the process.
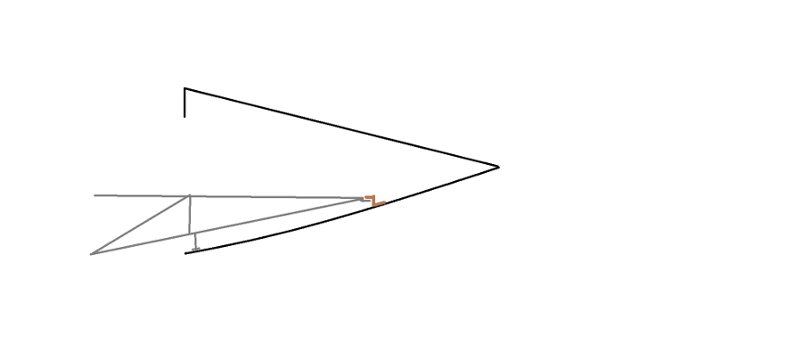
1. I drew a template of the existing instrument panel shape and transferred that to the fiberglass sheet and cut it out. I then attached some tabs for the top and side attachement
2. I clamped the template to the appropriate place on the frame.
3. I fixed two pieces of PVC tubing about 1 inch in diameter along the bottom of the frame representing the bottom edges of where the nose needed to go. Make sure these are at the angle you want the bottom of your nose to be.
4. I bent a sheet of fiberglass over the panel template and riveted it to the pvc and the tabs on the panel.
5. I did not use a template for the front, just made sure it was an even curve. The front will be open at this point.
6. I did the same thing to the bottom sheet.
7. I sanded the edges so they merged with the PVC pretty well.
8. Coated the PVC with mold release wax. The edges of the fiber glass sheet need to be left smooth so that a layer of fiberglass tape will stick but not stick too well. Don't fasten down the edges of this tape. I had no trouble with this but this outside layer will need to be peeled off.
9. Once you have shape you want, lay up one layer of fiber glass over the PVC lapping over the panels an inch or so. (This layer will be removed)
10. Once that setups up drill out the rivets and remove the pvc tubing. Put some additional release wax on the inside of fiberglass tape layup.
11. Layup fiberglass inside the cone using the thin outside layer to give you a smooth radius.
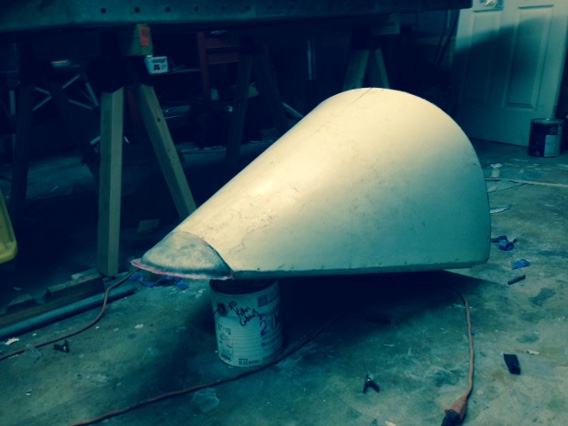
12. Once that has hardened, peel off the outside layer. (You should be able to remove the cone from the frame at this point.
13. Fill and sand the joints smooth.
14. Take a small block of foam (you can build this up from a few thin pieces) and attach it to the open front. I carved the back of the block to fit the hole and left a gap in a few places to run strips of fiberglass from the inside of the nose to the outside of the foam plug.
15. Sand the foam to the shape you want and then glass the outside overlapping the pieces already there. Edges should done by creating a 'lip' along the bottom (see photo) that the top can make a good joint with. Then fill and round out with lightweight filler.
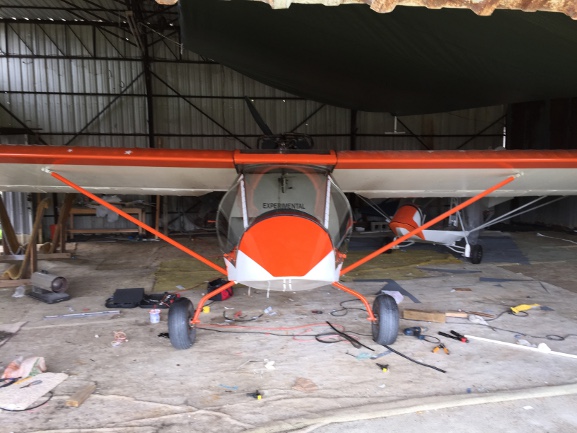
16. Fair it and paint it.
17. I removed the front nose frame attachment and used tabs welded to the front of the cage that attached to a Z shaped fiberglass lip within the cone. Pretty easy to reach from inside and invisible from the exterior. This is not necessary however and you can use the old attach points.
Hope that makes some sense and I'm remembering all the steps. It was actually easier than it sounds I think. Note that to use fiberglass on foam you will need to use epoxy as the polyester stuff will melt it.
Thanks,
Allan
| | - The Matronics Kolb-List Email Forum - | | | Use the List Feature Navigator to browse the many List utilities available such as the Email Subscriptions page, Archive Search & Download, 7-Day Browse, Chat, FAQ, Photoshare, and much more:
http://www.matronics.com/Navigator?Kolb-List |
|
| Description: |
|
| Filesize: |
7.87 KB |
| Viewed: |
5313 Time(s) |
|
| Description: |
|
| Filesize: |
105.04 KB |
| Viewed: |
5313 Time(s) |
|
| Description: |
|
| Filesize: |
67.88 KB |
| Viewed: |
5313 Time(s) |
|
|
|
| Back to top |
|
|
|
|
You cannot post new topics in this forum
You cannot reply to topics in this forum
You cannot edit your posts in this forum
You cannot delete your posts in this forum
You cannot vote in polls in this forum
You cannot attach files in this forum
You can download files in this forum
|
Powered by phpBB © 2001, 2005 phpBB Group
|

