Alan Carter
Joined: 02 Jul 2012
Posts: 378
Location: Kent, England.
|
 Posted: Sat Jun 15, 2013 11:00 am Post subject: New Torque tube Clamps Posted: Sat Jun 15, 2013 11:00 am Post subject: New Torque tube Clamps |
 |
|
Hello All.

This may be useful if you are considering removing movement in the stabalators torque tube of your Europa.

Myself i do not like stabalators on small aircraft even though they are more efficient, i much prefer the conventional tail plane and elevator with some natural stability built in.

So even though my aircraft was with-in the limits set out by Europa Aircraft Company, i decided to fit Pat Tunney's Torque Tube Clamps, LAA, Mod. SM 11906.


Pats clamps are similar and do the same job as Bob Harrisons clamps by removing the play which builds up between all the components that make up the the torque tube drive.

I believe Bob was the original designer of torque tube clamps, and Pat made slight changes to the design, so you have a choice to which you prefer, both types are LAA approved.


Before i start, I must remind you that i am use to 4 of everything, including engines,

so i asked Pat to carry out my own little mod to his clamps, which was to include Headed Dowels with a retaining cir clips on each of the dowels.

This is all located under the clamps, and used as a secondary retaining device,

as the clamp itself encases the dowels and holds all the dowels in place.


This extra work caused  lots of problems, and in everybody's opinion not necessary, as the dowels are retained by the clamps as mentioned,

but me being use to four of everything  decided i wanted them, So Pat came round and reluctantly made them up just to please me.

I also decided i wanted to keep my mass balance tensioning wires, again no one thought either my Mods are necessary,

but a couple of pilots have heard the mass balance weight knocking against the tower in turbulence,

again no problem as the tower itself with its Teflon strips holds the weight in place, but i like the wires so decided to keep them>


I thought a simple letter of explanation to the LAA would do the trick, but this was,nt the case,

i ended up handing all the paperwork over to Pat and he did a wonderful job in getting the required approval. OK the LAA have a job to do and maybe some nice drawing

are more professional, now  i have my own Mod. Number AC 11906.

But i would not try this again due to the work involved.


Pat came down to the hanger and took command of the work, he really does a good job

and i probably would not have managed it by myself.

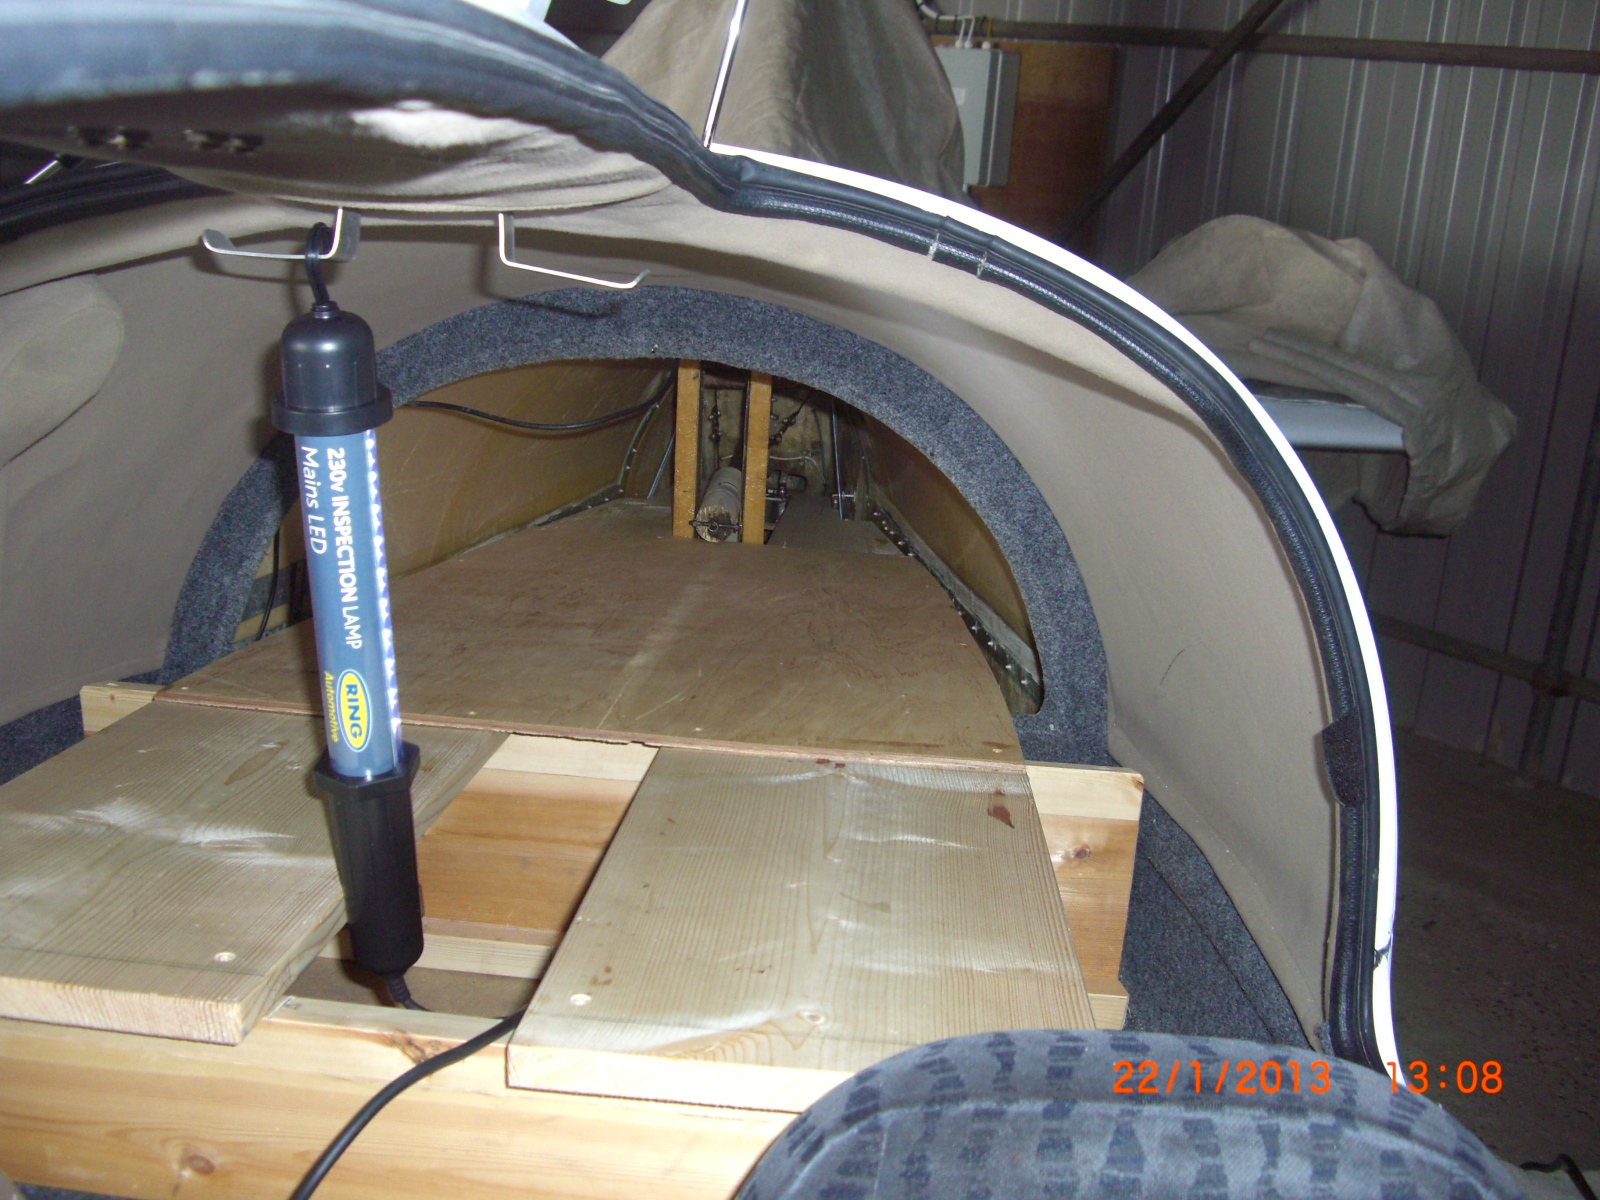
To do the job you can go down the tunnel or work through the rear 4” inspection hole, either way is difficult, but make sure you cover the edges of the inspection hole

with many layers of masking tap to prevent tearing your arm apart.


It was winter with the temperature about  Zero as we have no heating for the hanger,  the first job is to get the split pins and dowels out of the tube,


some pilots have taken 4 to 6 hours to do this job alone,as you are working blind.

We did very well, and managed to get all four dowels out in one and a half hours,

so we where feeling good and thought we would be finished by lunch time.


To get the split pins out its best to flatten them and push up with pliers, then with a bradawl keep pushing up through the hole,

most pilots mange to get this far in get the dowels out.

To our surprise the dowels we have just removed are 3/8” dowels, they have already been upgraded from standard 1/4”dowels put in at time of  build,

with an airframe that has only has 350 hrs on it.

You can make up your own mind about this, i said what i thought on the forum a long time ago and received some flake on the subject.


Next is the job of separating the components making up the torque tube, this was a problem you could do with out,

i know of two  pilots that have got this far and gave up because of fear of damaging  the components,

i can appreciate now why they gave up and stopped,

and decided to call it a day

and ”Re-Applying the Loctite 604 as in the approved Mod 70”.

I know another pilot who had a clean tube and it all came apart easily, but it took him a day to get the dowels out

However we where stuck, very stuck, it did not move, so two pygmy lights inserted down the tube for heating,

and retried, it moved about 10 degrees, it was not going to move , three hours later we had only  managed 20 degrees, it was not going to come apart, i had given up in despair,

Pat was not going to let this beat him  ,Pat was not happy with doing this but went ahead,, he got a big ring spanner around one of the Flange drive pin as a lever,

i must say i did not like this, its my aeroplane,

and with brute force, i mean the brute force of both of us twisting and tugging ,

we managed to get it wriggling, and bit by bit and eventually off.

What a sod of a job, but it was off. Pat checked the pin and alignment all seemed OK this had been a very worrying time so was glad it was over.


Remember we have been at this for well over 6  continuous hours in temperatures below freezing, we where very tired, we had the tools

but did not think at the time. It had been really hard going and many times near to giving up.

Looking back we should have drilled a couple of 1/4” holes to locate the drive pins, in a length of 2”x 1” and taped it to the drive flanges

using this to twist and lever the tube out, also a soaking of Plus gas on the tube, this would have done the job much better.

So use this idea if you are going to have a go your self, and my God be with you.

Seven + hours later Pat is putting the tube into the boot of his car,  This had been a really difficult job ,

due to the old Loctite used in the original Mod 70.


Pats clamps are individually made with fine tolerances to fit individual torque tube,

all the holes are machined round and new dowels made to fit,

the clamps are made to prevent these holes from wearing again,

its not a matter of just fitting clamps on worn dowels and holes,

even though Pat tests the clamps with the dowels removed to check for any movement.

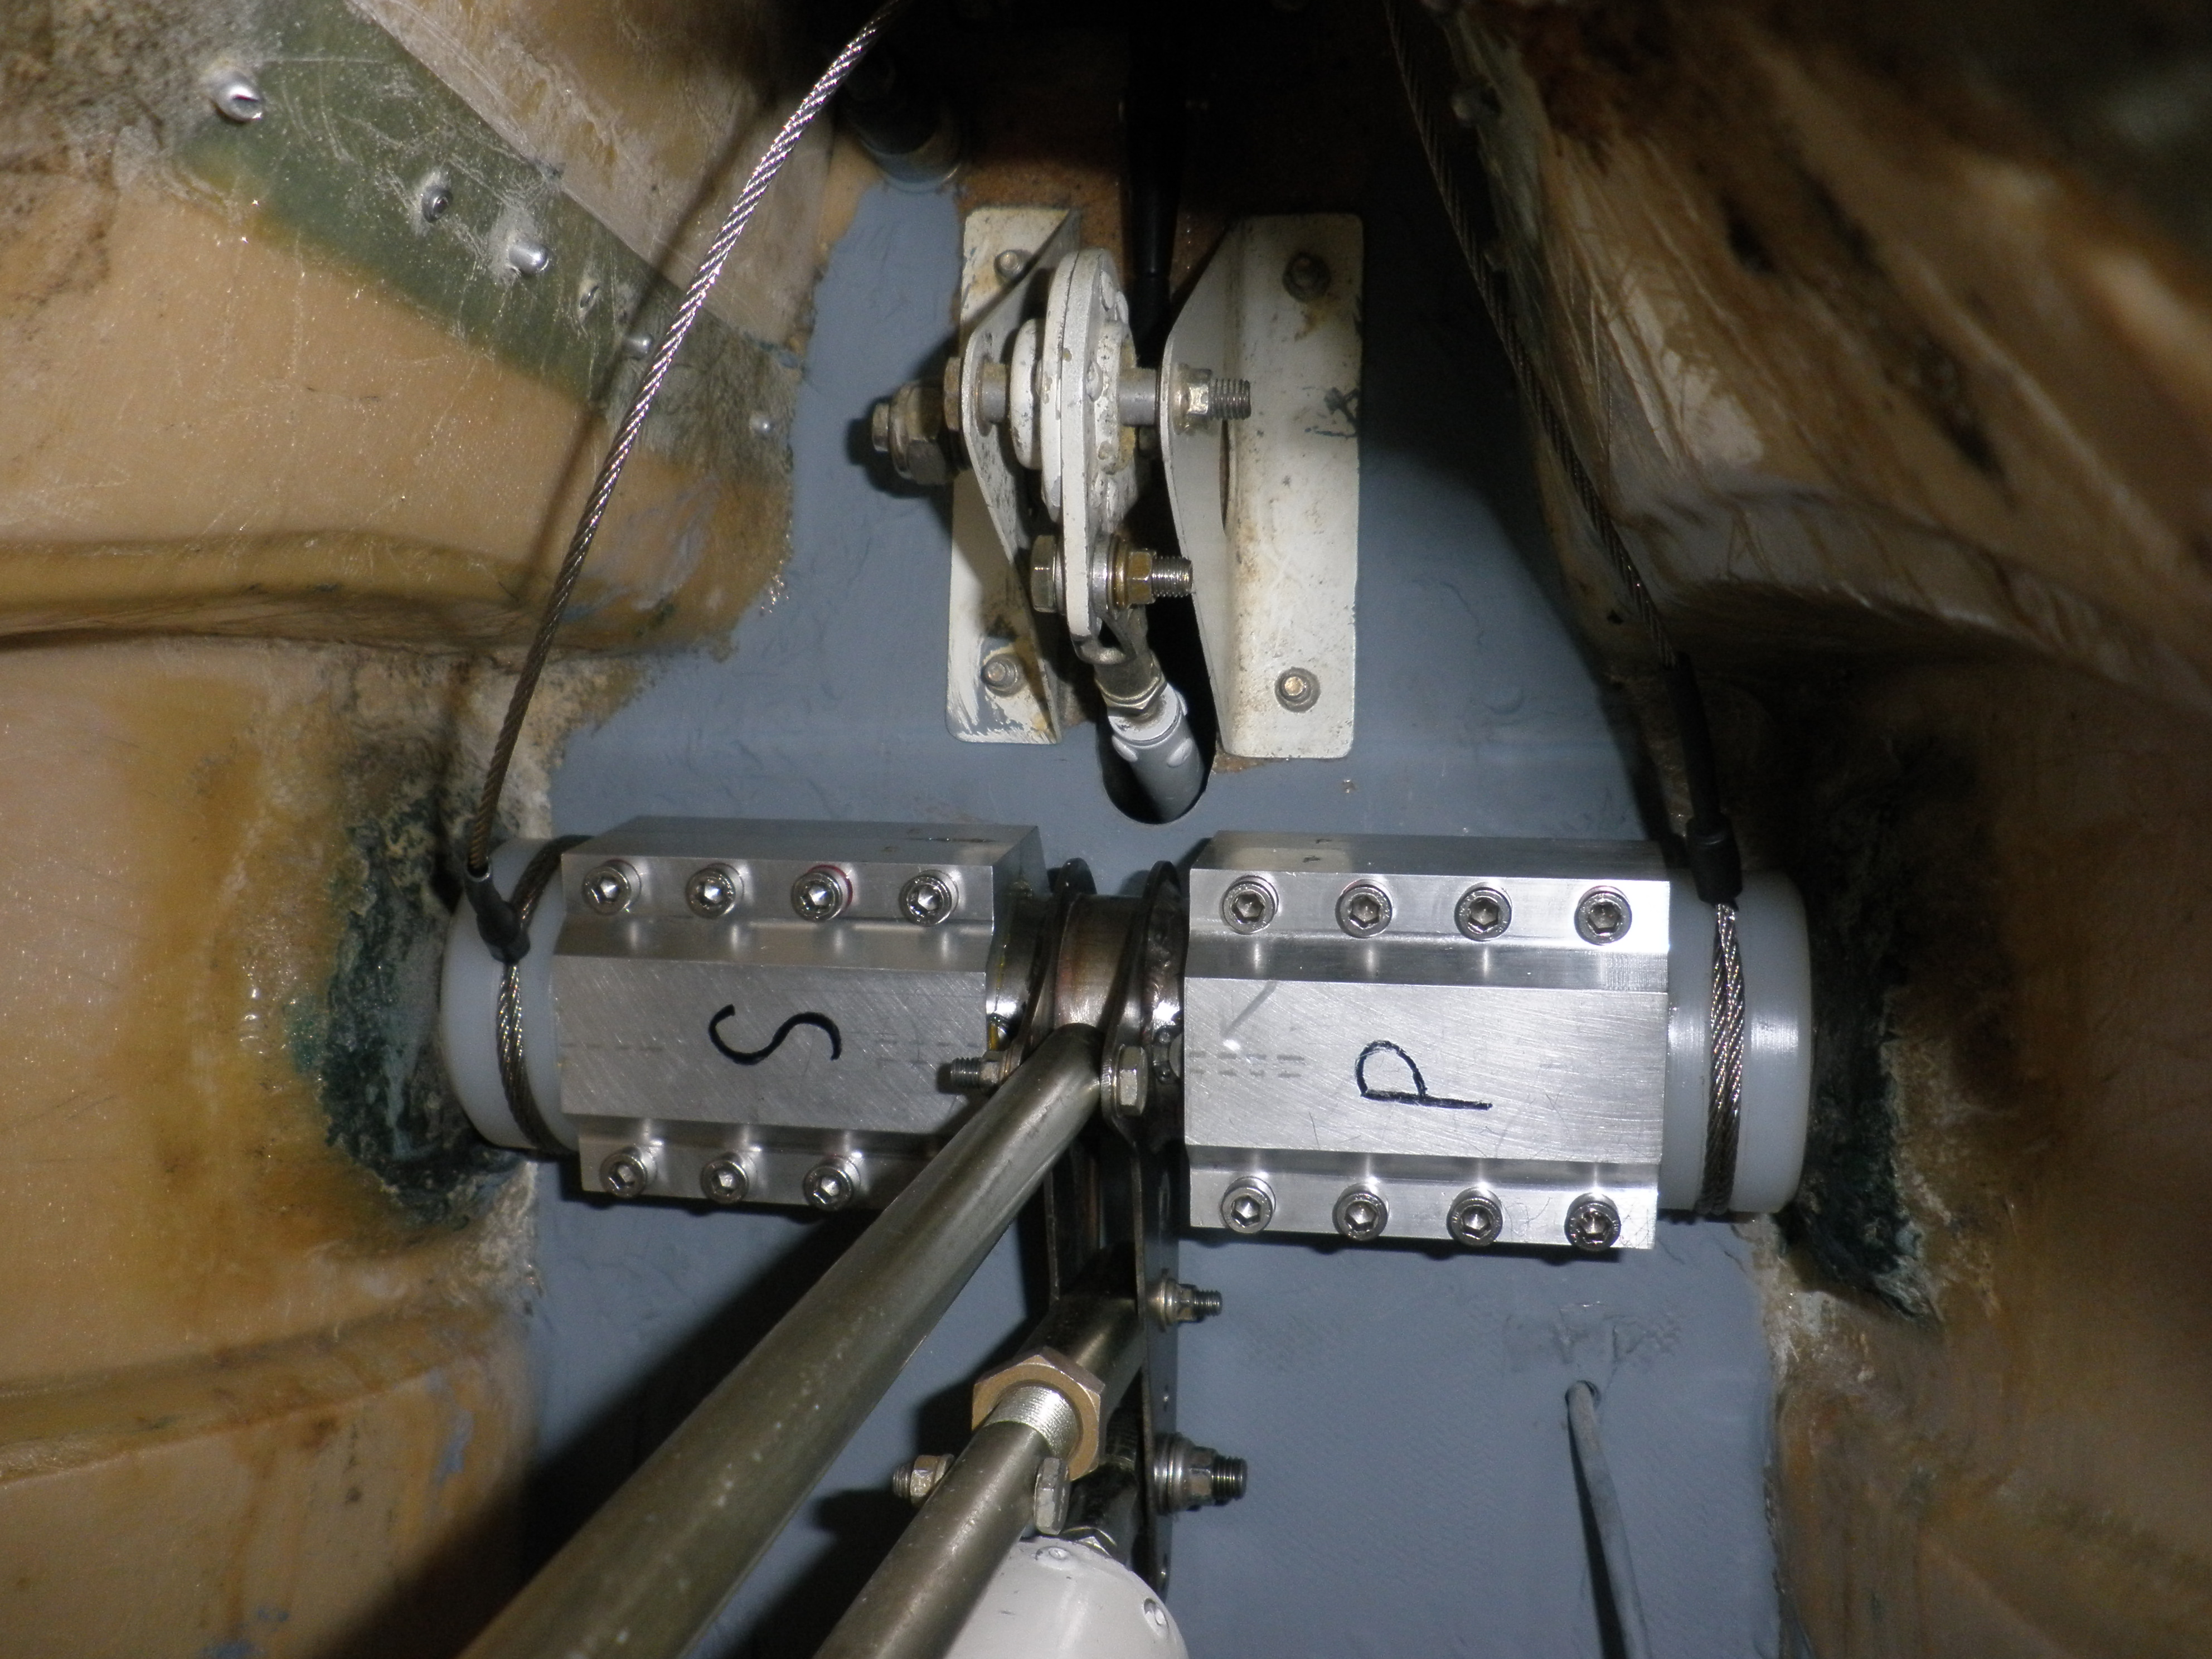
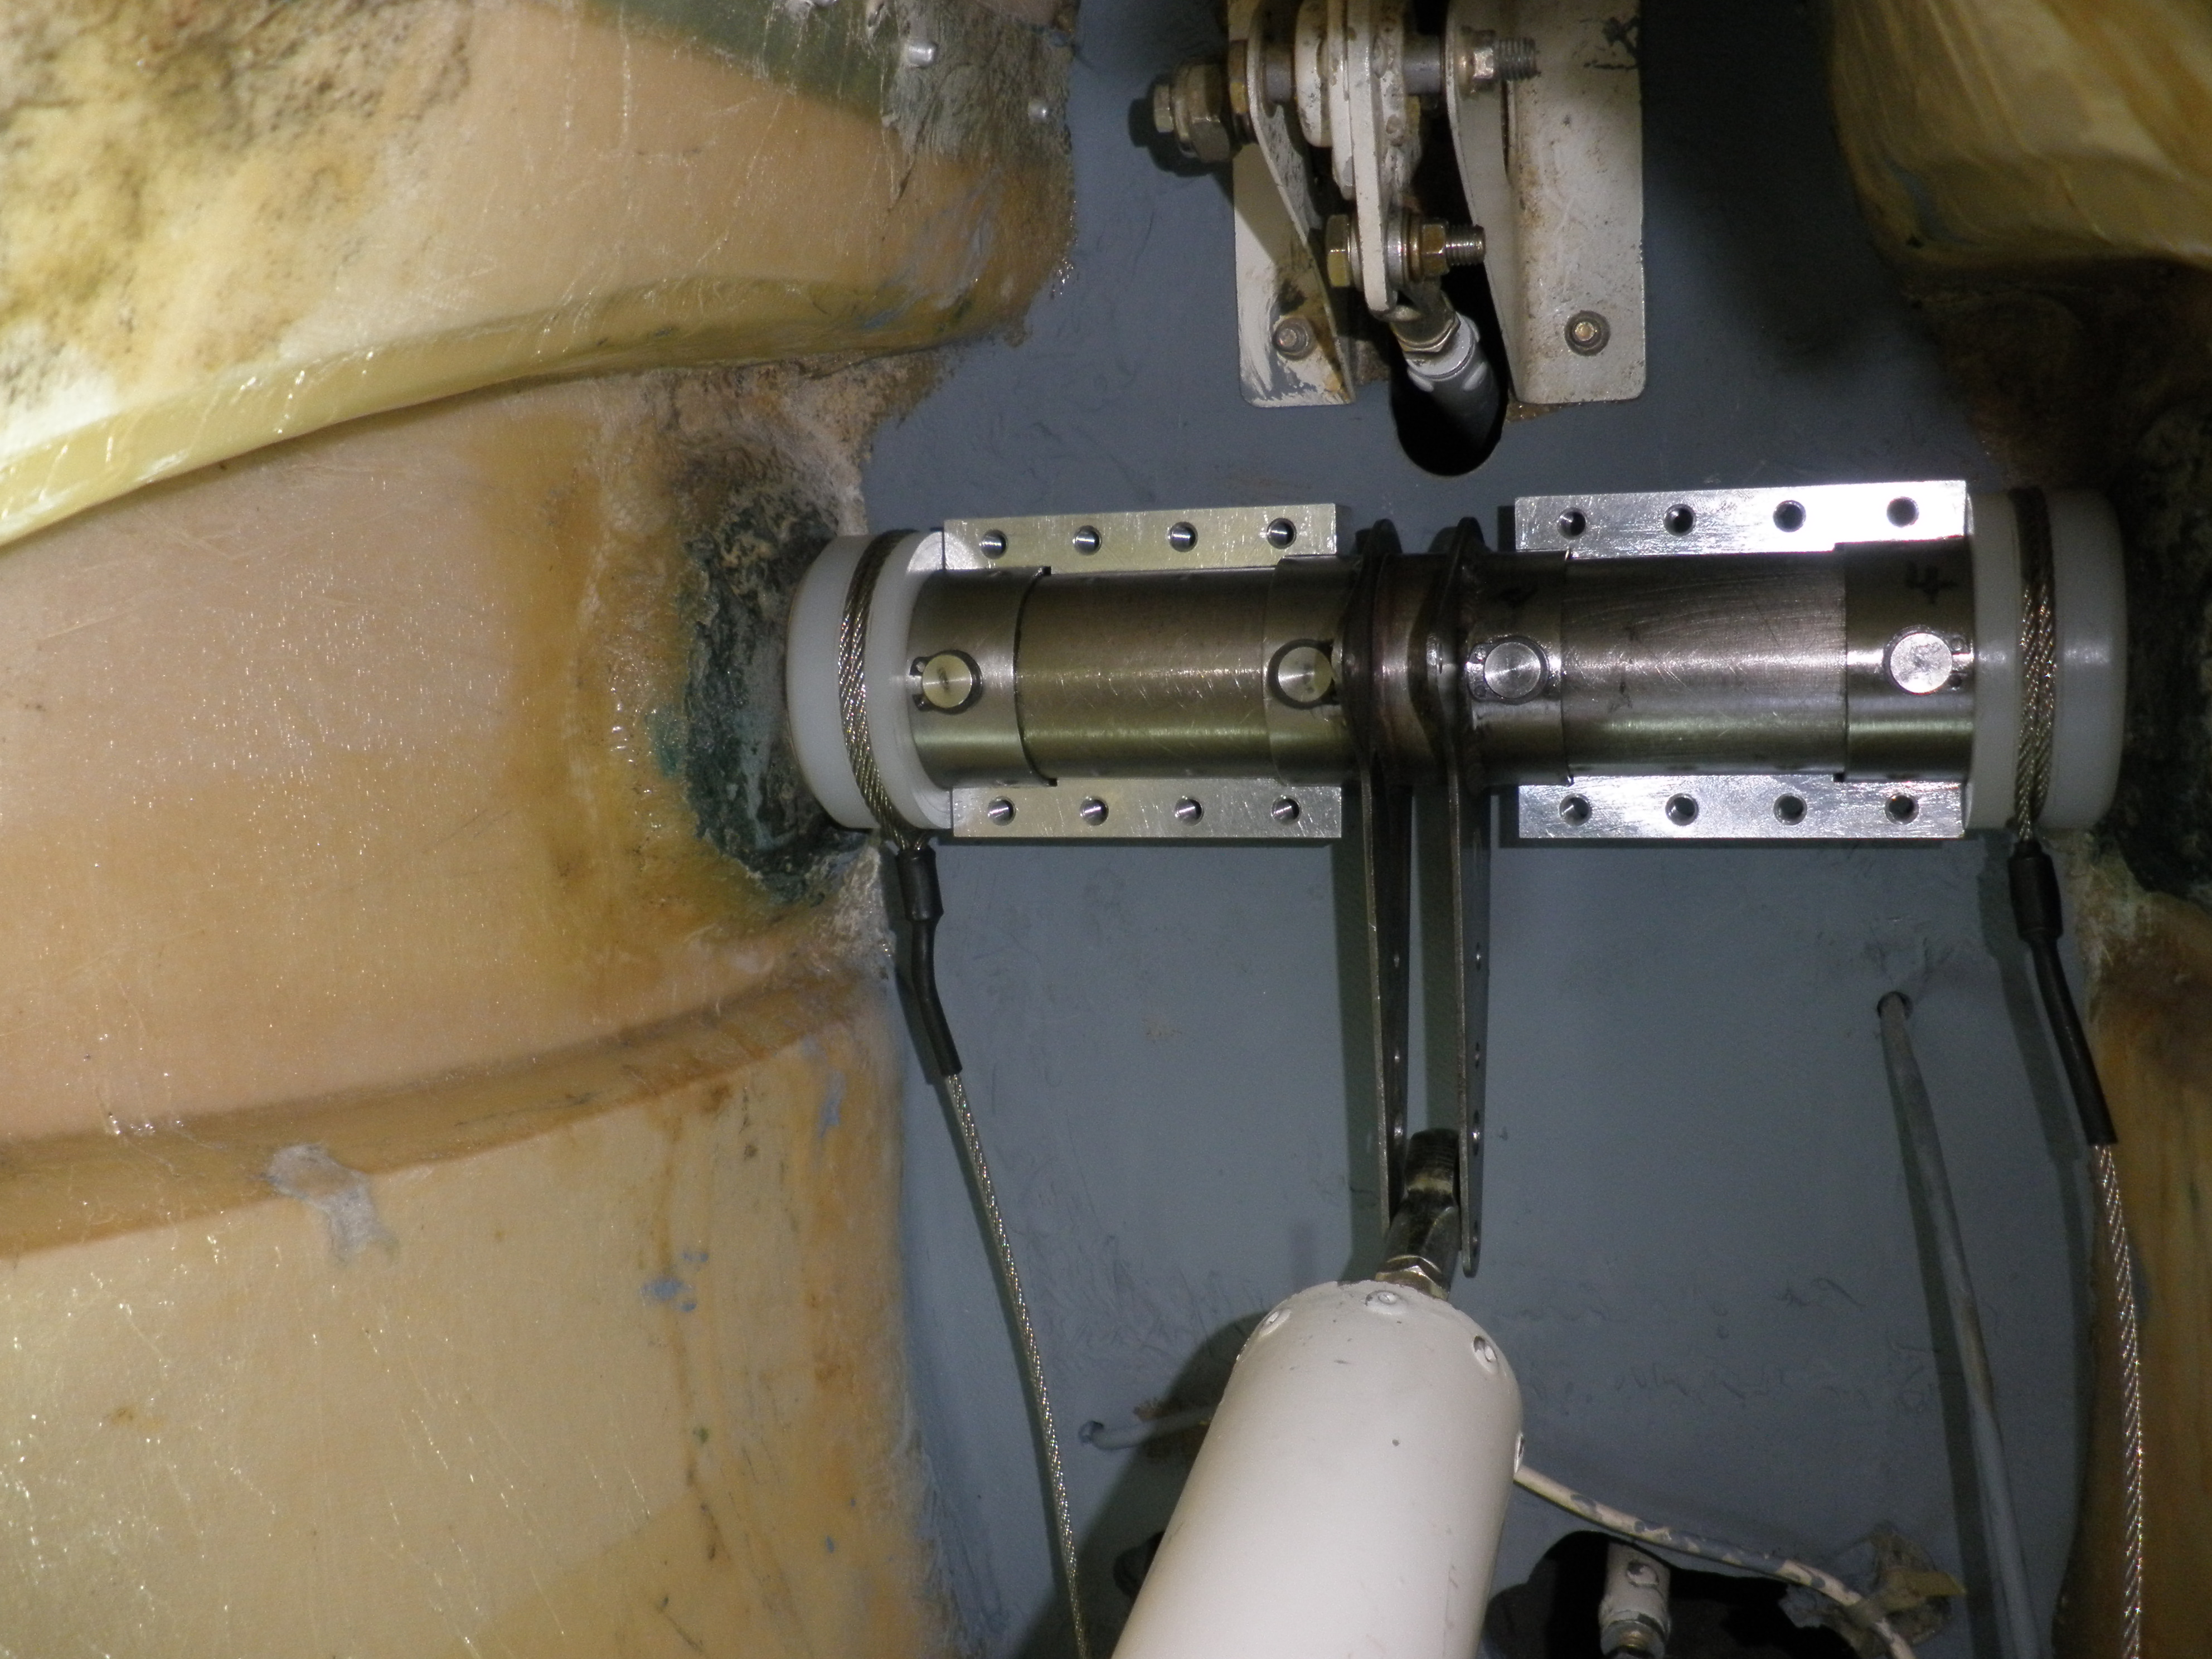
You can see from the photo,s the clamps and the dowels cir clips, and retention wires partly fitted with the new thicker nylon spacers, all self explanatory,

so will now move on to the refitting.


The the Redux around the bronze bearings was a bit rough, so i cut it away and re Reduxed it, on the outsides only.

I had to make up a couple of heated boxes to place over them for the curing,  its now neater and all stronger than before.


Some weeks later an All Clean and Shinny all Pre Assembled Clamped Torque Tube arrived , you could have fitted it and been flying within 3 hours, so finished by lunch time.

Well not on my aeroplane, the distance between the torque tube and the rear bulk head, 32 mm is OK, 25 mm is OK, 20 mm is OK, the clamps will go round easily ,

but my bulk head was not in the right place and not at right angles to the fuselage, it was not made correctly at build.

All i am going to say is that we manipulated all the components and worked a miracle,

but this miracle took Me and Pat 8 hours of every way and which way,

this job, it should have been a walk in the park,

most would have given up, it really was mission impossible,

but we done it.


When i look down the back from the D panel , my balance weight goes up and down without touching the Teflon in the tower,

and even if i say it myself  it all looks really good and sturdy so i am pleased with the work done.

Many thanks, Pat, a job well done, and as my old teacher use to say , if it looks right, it is right. and it does just that.


Finally if you are intending to check your stabalator for play, do it right,

and use 3 people, steady pressure applied from the stops, upwards and downwards,

with the third person marking the amount of movement at the trailing edge on a piece of wood,

you can-not do this test by yourself, you are not looking fore as one thinks, a floppiness, but rather a small definite movement when the friction is overcome,  believe me.

Something like 1 mm or less at the dowel equates to 1/2” at the trailing edge.


Also check the elongated slots the pipe pins go through  on the torque tube, mine where only elongated on the top side, both top and bottom should be elongated.


The aeroplane is all passed and has a new permit, managed to do this bit of paper work myself and i must say the LAA turned it round very quickly in just a few days.

Now i have a bloody Mag drop, and need a new ht coil. How much is a coil, yes nearly £300, probably made in Chine for £2.50

Crazy.


Regards.

Alan
| | - The Matronics Europa-List Email Forum - | | | Use the List Feature Navigator to browse the many List utilities available such as the Email Subscriptions page, Archive Search & Download, 7-Day Browse, Chat, FAQ, Photoshare, and much more:
http://www.matronics.com/Navigator?Europa-List |
|
| Description: |
|
| Filesize: |
680.52 KB |
| Viewed: |
1772 Time(s) |

|
| Description: |
|
| Filesize: |
2.43 MB |
| Viewed: |
1772 Time(s) |

|
| Description: |
|
| Filesize: |
2.39 MB |
| Viewed: |
1772 Time(s) |

|
|
|


